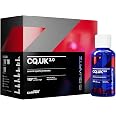
🚗 Elevate Your Ride with CQUARTZ UK 3.0!
The CARPROCQUARTZ UK 3.0 is a premium ceramic coating kit designed for car enthusiasts seeking superior protection and gloss. With a high silica-quartz content, this 50ml kit offers unmatched durability, UV resistance, and versatility for various surfaces, ensuring your vehicle looks pristine for years.
| Brand | CARPRO |
| Color | Clear |
| Finish Type | High-Gloss |
| Size | 1.69 Fl Oz (Pack of 1) |
| Item Volume | 50 Milliliters |
| Special Feature | UV Resistant, Washable, Chip Resistant |
| Unit Count | 1.69 Fluid Ounces |
| Specific Uses For Product | Exterior |
| Surface Recommendation | Ceramic,Glass,Metal,Plastic |
| Indoor/Outdoor Usage | Outdoor |
| Item Form | Liquid |
| Included Components | (1) CQUARTZ Foam Applicator Block, (1) 50ml bottle of CQUARTZ UK 3.0 (Use 15ml+/- per coat - average size car), (4) 4" MF Suede applicators, (1) 16" x 16" Orange Suede Leveling Towel |
| Age Range (Description) | Adult |
| Is Waterproof | True |
| Model Name | CARPRO CQUARTZ UK 3.0 - 50ml Kit |
| Package Information | Bottle |
| Coverage | Use 15ml+/- per coat - average size car |
| Water Resistance Level | Waterproof |
| Manufacturer | CARPRO |
| Item Weight | 6.7 ounces |
| Item model number | CP10CQK50 |
| Is Discontinued By Manufacturer | No |
| Exterior | Gloss,Metal,Painted,Plastic |
| Manufacturer Part Number | V3_10CQK50 |
| Special Features | UV Resistant, Washable, Chip Resistant |
C**6
Incredible, Glass Like Finish, Incredibly Simple- 30ml is Way More Than Enough
This review is also coupled with the other products I used as they all helped to get to my final finish. Products used in my setup:Chemical Guys VSSChemical Guys White LightCarPro Cquartz UK 3.0Torq X Polisher with Orange Pad for Cutting and Blue Pad for spreading the White Light.Meguires Claybar 200gGriots Garage Iron RemoverMothers Magnesium PolishUsed Provided Microfiber clothes from Polisher (from chemical Guys)Now I did not take a picture at each step in the process as the end result is what truly matters and it saves 30 photos being uploaded here. I did inspect the paint at every single new stage and can report for each step. I will do my best to be descriptive with my findings to help all those who come after me.This work is done on a 2016 Summit White Camaro with 34,000mi on it and I got the car at 21,000mi from previous owner. I have about 3/4 years experience detailing but that is not needed to get amazing results, just time spent on the work itself. The first owner did leave scratches and swirls from improper washing but this was all on the surface. My process took my 9 hours not stop start to finish including all curing times and standard waiting period. This work was done on a vehicle stored in a garage overnight at a constant 65 degrees thanks to three heaters.1. I have the vehicle a wash with My standard soap setup and I don’t believe this had any effect on the end result as it was a simple car shampoo with zero additives but it was ph neutral. I wash my car weekly even up in Chicago winters so I don’t need a strong soap.2. I proceeded to use the iron remover on all surfaces of the vehicle with little agitation after the dwell time and proceeded to wash off with a spray bottle of water and a microfiber towel.3. After drying the vehicle I then claybarred the entire vehicle on every painted surface and used regular water as lubricant to avoid introducing extra oils or substances to my finish. After this step the paint was incredibly smooth and contaminant free as I spent pain staking time going over each body panel to make sure every single spot was touched and fixed up. It took awhile but it is all in the prep work when polishing and then ceramic coating as that final layer locks in all your work, and imperfections if you’re not careful.4. I then took some rubbing alcohol and lightly went over the entire vehicle to ensure a sterile surface and I didn’t feel the paint at this step as I did previously and this was entirely about keeping it contaminant free.5. I then took out my polisher and VSS and began taking off my scratches and swirls. There are tons of videos on YouTube from chemical Guys to teach you how to properly do this so I will skip the lesson, I did use the Orange Hexlogic cutting pad. After working in small areas and taking my time very slowly I worked panel by panel and I was happy with the little fatigue I experienced from using the machine. At the very end of the day it didn’t feel like I used the polisher for the 5 hours that I did total, very impressed. I bugged off the Polish per the instructions and wait time and was left with an incredibly glass like surface that eliminated all of the imperfections of the paint. This took the longest off all steps and was close to how long my clay service was but I wanted to leave no swirl behind and I spent very long. (A desk chair with wheels or anything to sit that rolls makes your life thousands of times easier than standing for so long)6. I followed Up the Polish with the WhiteLight and using the polisher to spread the glaze was incredibly easy and a little goes a long way. You use way less than if you did it by hand and it spreads very thin and I used speed setting two for this with no pressure but the weight of the machine to apply. After this step was complete I checked the finish and it was like a mirror, cool to the touch and silent when touching with the back of my hand. I was very impressed and I went into this thinking there was a placebo effect that it’s for white cars it’ll make it pop but I’ll only think so after pouring hours into it and wanting to see a difference. I got two outside opinions from the start of the day to this step and they noticed a massive difference and compared this to a car on a museum showroom it was perfect.7. I then followed up this process with applying my ceramic coating and this was a very easy process with incredibly fast flash time and the spreading was incredibly easy and a little went a very very very long way. I barely used a quarter of the vile and it always had an even coat that I checked constantly under light to make sure I wasn’t running it too thin. I have a plastidipped black roof and rear section of the vehicle and I tested a small spot first and when there wasn’t a reaction I also coated the plastidip as the box said it’s ph neutral and safe on nearly anything. After applying I noticed the plastidip had a slick feel and was very glossy (I had 3/4 coats of gloss on mine as I wanted the gloss level to match the OEM white) and I was very impressed. The pictures provided are after I finished the entire day with my vehicle, although this was the last step the paint saw.8. My last steps were using mothers metal polish for my exhaust tips and what an incredible difference it made. I later cleaned my windows and interior and followed up with my engine bay and then my tires. Finished the day with Meguirs Tire Gel and then let the vehicle sit before I drove it for as long as I could that the time of day would allow for.Overall the combination of the products worked incredibly well and each one used for the paint would be amazing by itself and in combination with your other favorite products, I just gave my list of products used to help others as I love reading in depth reviews for these important topics and the amount of products out there. My pictures provided aren’t of the highest quality as I can’t take quality photos and it was a long day and I was just happy to drive my car after. I would entirely recommend the products and the others mentioned and the biggest thing is the prep it takes to get the paint entirely clean and then having the time in the day to devote to this job. I haven’t tested the ceramic capabilities as it has to allow 24 hours before contacting water at all and then it still cures over the next 5 or so days, but it feels and looks amazing. I recommend 100% and I am in love with the look and feel of my vehicle.
M**
10/10 - Great Product (see photos)
I applied this to my 2025 BMW X6 M, Tanzanite Blue Metallic II. Photos attached show final result :)I did sooooo much research and read soooo many product reviews before just going ahead and trusting this CarPro product. This was my first time applying a ceramic coating because I did not want to spend thousands of dollars on the fancy “3-5 year coating” these shops claim. TRUST ME, THIS PRODUCT WORKS JUST AS GOOD. Very easy to apply, just follow the simple instructions.When I first applied the coating I did not see much of a difference honestly. I finished around 6pm, but when I pulled my car out of the garage for work the next morning at 8am, BOOM! I INSTANTLY saw a difference. My metallic blue was much more “deep” and sparkly. It rained yesterday and the droplets beaded up and flew away in the wind. I would highly recommend this product. I will apply yearly :)
J**E
Perfect for vehicles and e-bikes.
Used many times in many different vehicles including BMW, Vettes, SUVs, and even e-bikes. Works great. Shiny and water repellent.
V**S
Good quality ceramic. Easy to use and does amazing things for the look of the car.
I was introduced to this by a friend and I am very happy that he did. Makes the paint shine and look reflective. The rain beads up and rolls off twice as easily as wax. It apparently lasts longer than wax too. That part is yet to be known, but great stuff so far.
D**.
GOOD STUFF
I gave this 4 starts due to I'm old school, I like to feel that soft slick feel after waxing my car. I am not a Pro Detailer I'm just a consumer. What I want you to take out of this is watch videos on how to use this product, I recommend watching Pan The Organizer video ( Thank you Pan for your YouTube videos on this stuff ) The number one thing for this product to come out looking great it the PREP WORK!!! This job took me 9 hours from start to finish to get this car to look this good this is a 2010 Dodge Challenger. It looks great but it does take time to put on and take off, I followed the directions to a T and the weather was perfect 72 with no sun the whole day. It goes on wet two min later you need to take it off, it will smear but the more you wipe the more it starts cleaning up very nicely two feet sections at a time only I recommend. Thus the time it takes to put on and take off. The PREP WORK is so IMPORTANT!!!!! PLEASE PLEASE PLEASE Watch the videos on how to prepare your car for this sealant. So plan on a full day of detailing because in the videos they show you a newer car and it looks like they just wash and apply this stuff, not so easy on older cars that need a little to a lot of TLC. I hope this helps and remember this is really GOOD STUFF if you prepare your car in the right way.
C**Y
Awesome stuff!
My car looks all glossy and shiny now. This works as described and was really easy to apply. Definitely want to get a painter's mask for when you apply it. My car looks cleaner all of the time. I used the entire bottle. I also used the reset shampoo beforehand. Very low maintenance I don't feel like I need to handwash the car often at all. I rustproofed my undercarriage through Ziebart so we will find out if it ever even matters that I never wash the car!
Q**3
Wet your car
You can get less expensive or more expensive ceramic coatings for your vehicle. But, this is what I've been using the past 5 cars I've owned... even prior to this latest 3.0It goes on easily... as per directions. In the southeast where I live, I get about 18mths+ of protection and water sheathing. 2 coats... overnight curing... 1 coat of Gliss the next day... followed by maintenance washes and Reload application. I've used it on gray, white, black, blue and now on a Palladium Gray MB S550 4Matic. Stunning results .
K**N
Works great
This stuff actually works IF you properly prep whatever you're going to ceramic coat. I used this on my carbon fiber hood mainly for the UV protection but other than that the water beads off without leaving a trail.
Trustpilot
3 weeks ago
1 month ago