Kundendienst
Kundensupport
Regionaler Zugang
Rechtliche Hinweise und Richtlinien
Holen Sie sich die App

Richten Sie Ihre Kamera auf den Download der App
Copyright © 2024 Desertcart Holdings Limited


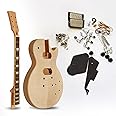
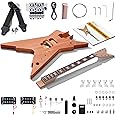
🎶 Build It, Play It, Own It!
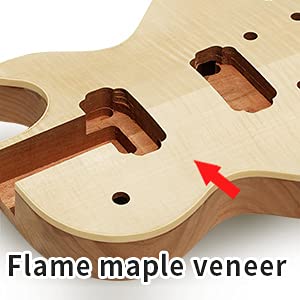
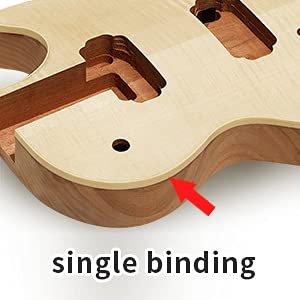
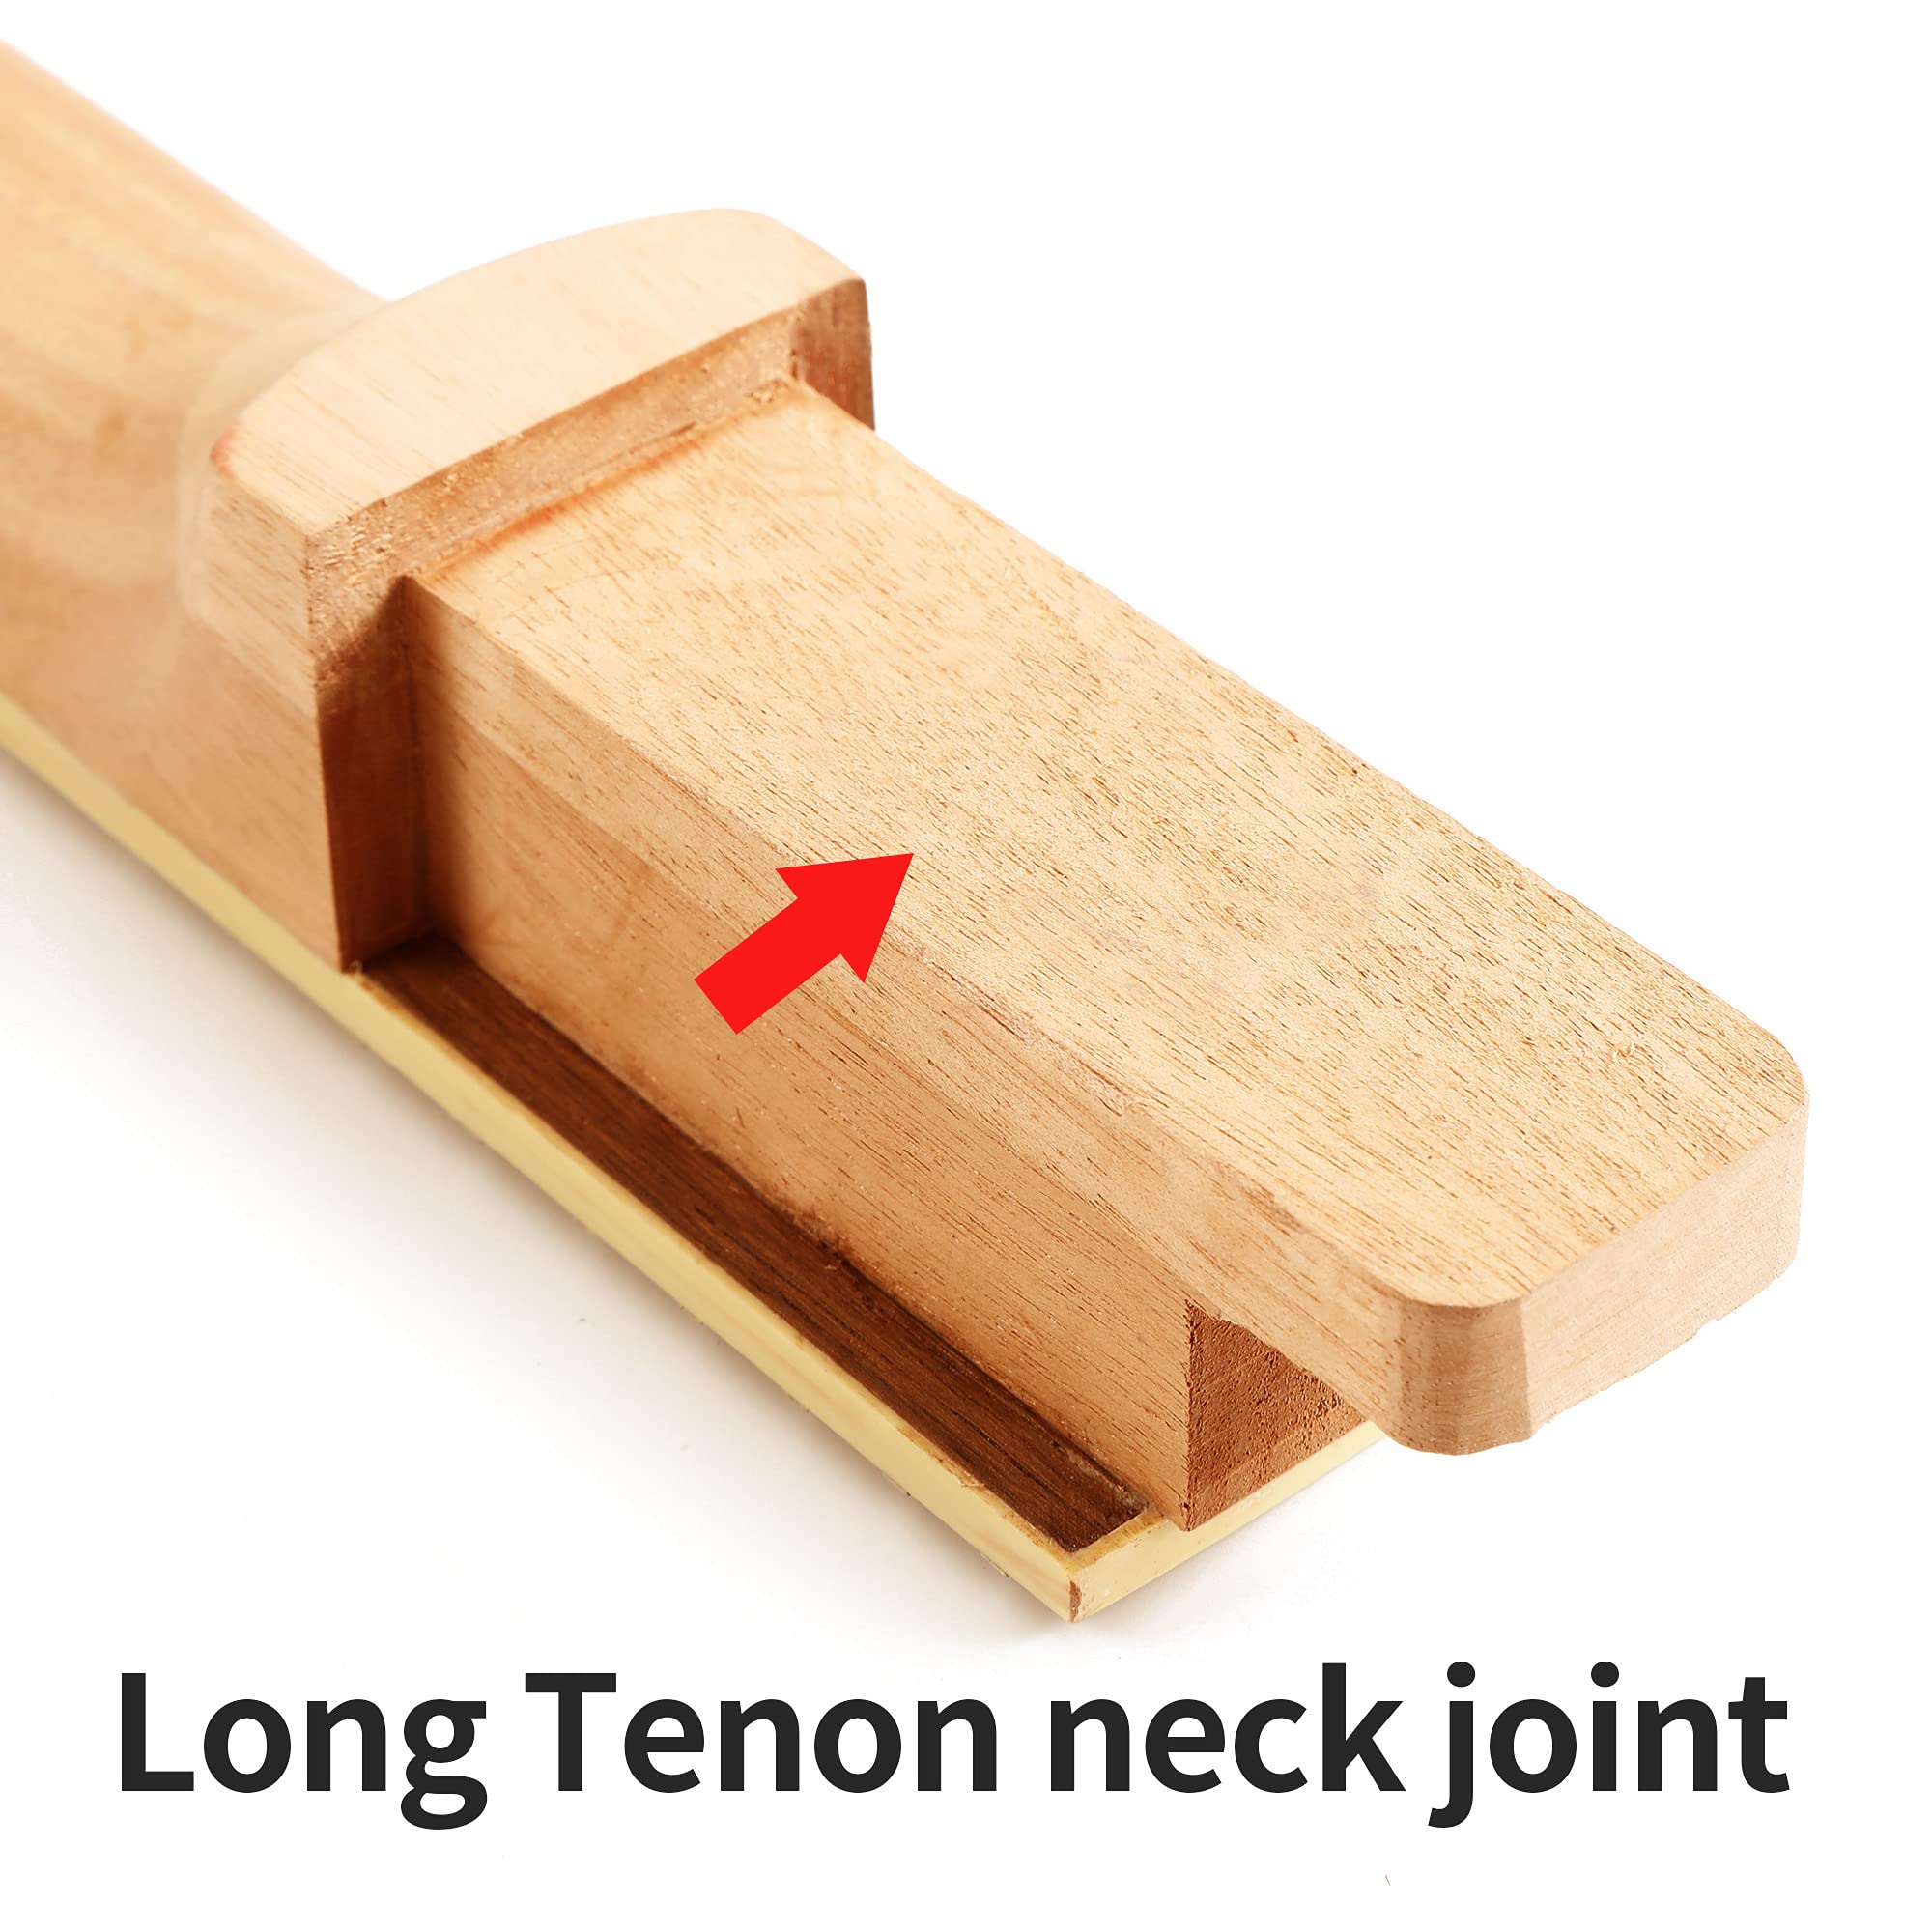
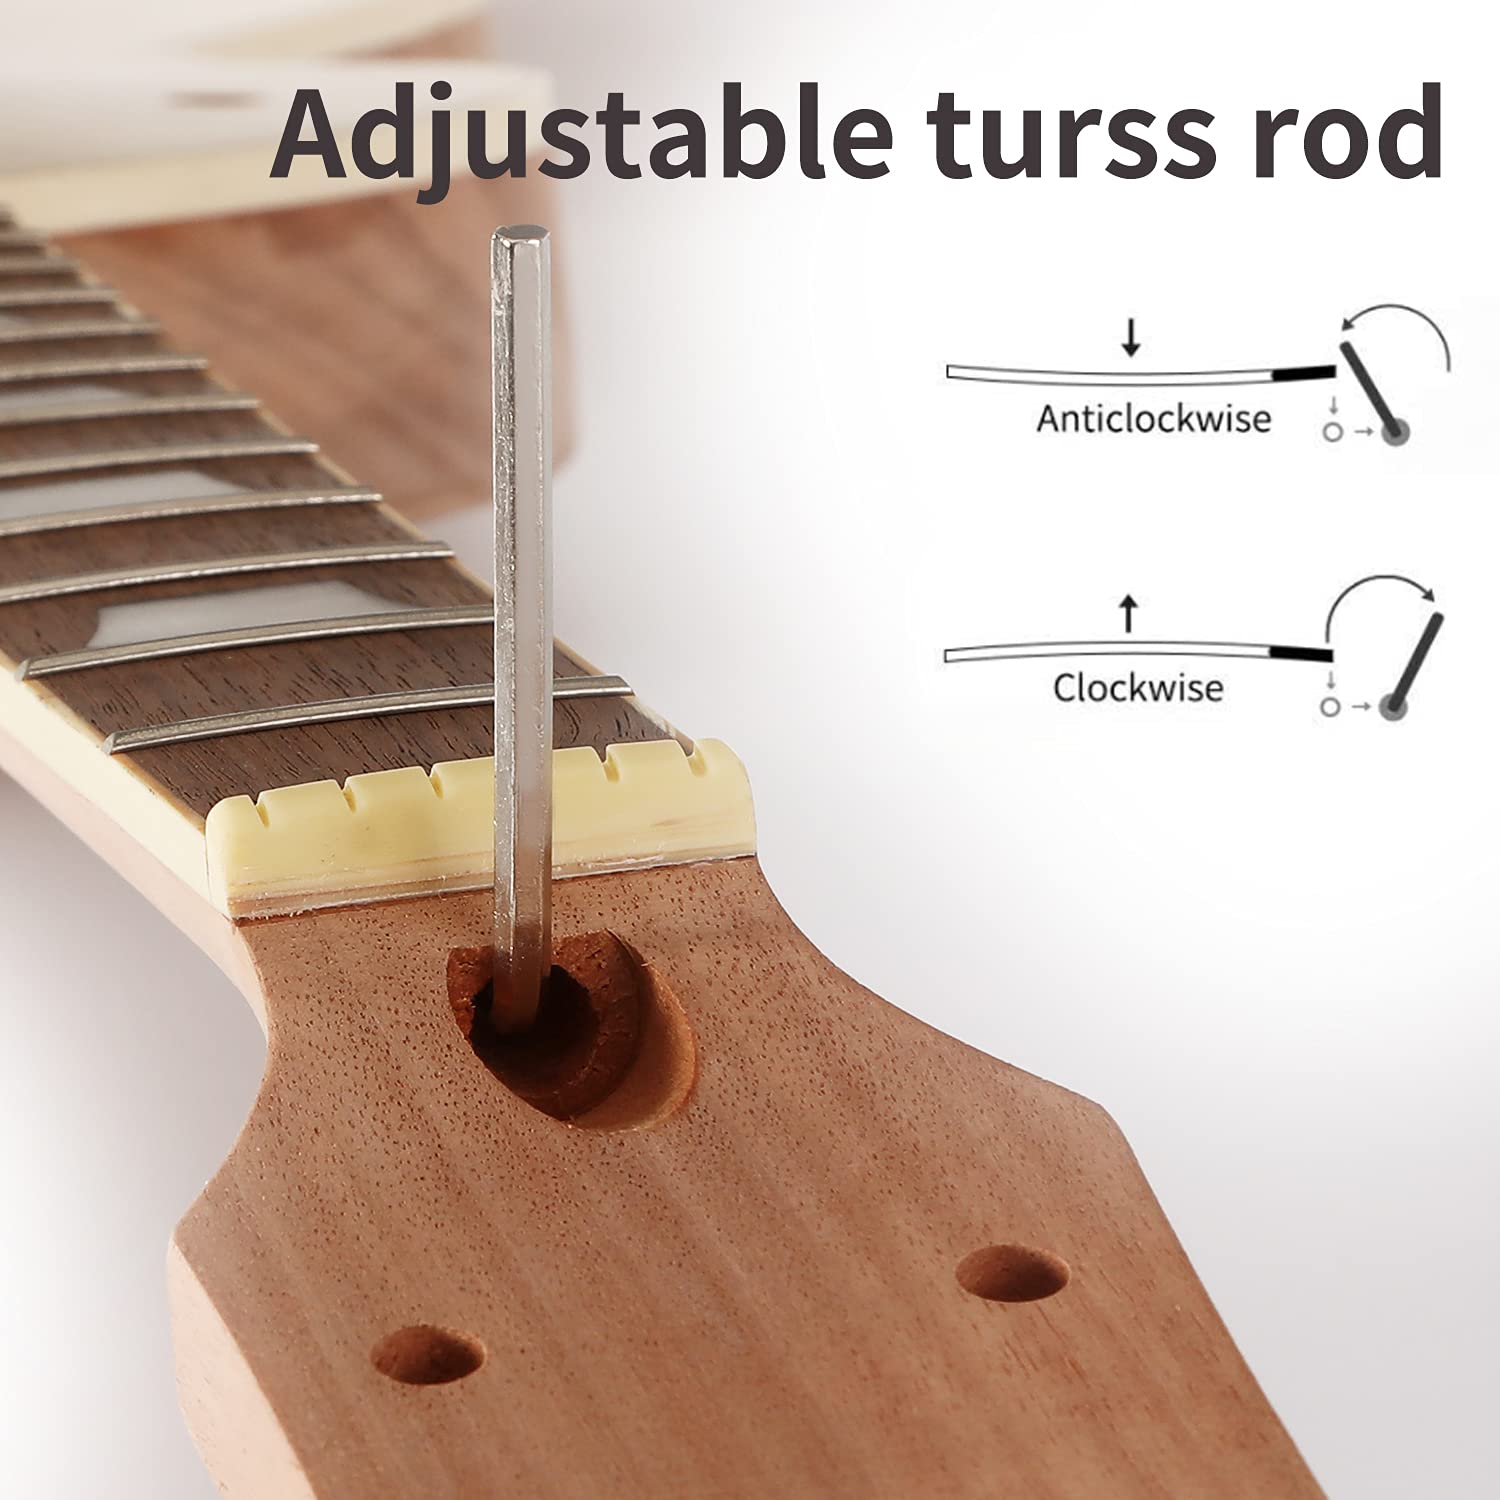
The DIY Guitar Kit offers a complete package for aspiring guitarists to create their own electric guitar. Featuring a Long Tenon neck joint for enhanced resonance and sustain, this kit includes a CNC-crafted body made from Mahogany with a stunning Flame Maple veneer, a Rosewood fretboard, and all necessary accessories, including an adjustable truss rod for personalized setup.
T**R
Take your time and don't try to rush though it
After the neck was glued to the body, the most difficult part of the project was applying a decent finish. For a simple stain, I used a mixture of colored enamel paint diluted by acetone, which is basically nail polish remover. That worked just fine.Then I coated the stained finish by using Minwax wipe-on Polyurethane. I applied about eight coats. It came out nice and glossy. I don't use spray on poly, because it's too messy and the results are sometimes unpredictable.To use the wipe on poly, it's best if the guitar is in a horizontal postion when it dries. Other than that, applying the electronics was a snap. From start to finish, it took about three weeks to complete.The finished guitar looks good, plays great and sounds even better!
A**T
My honest detailed review
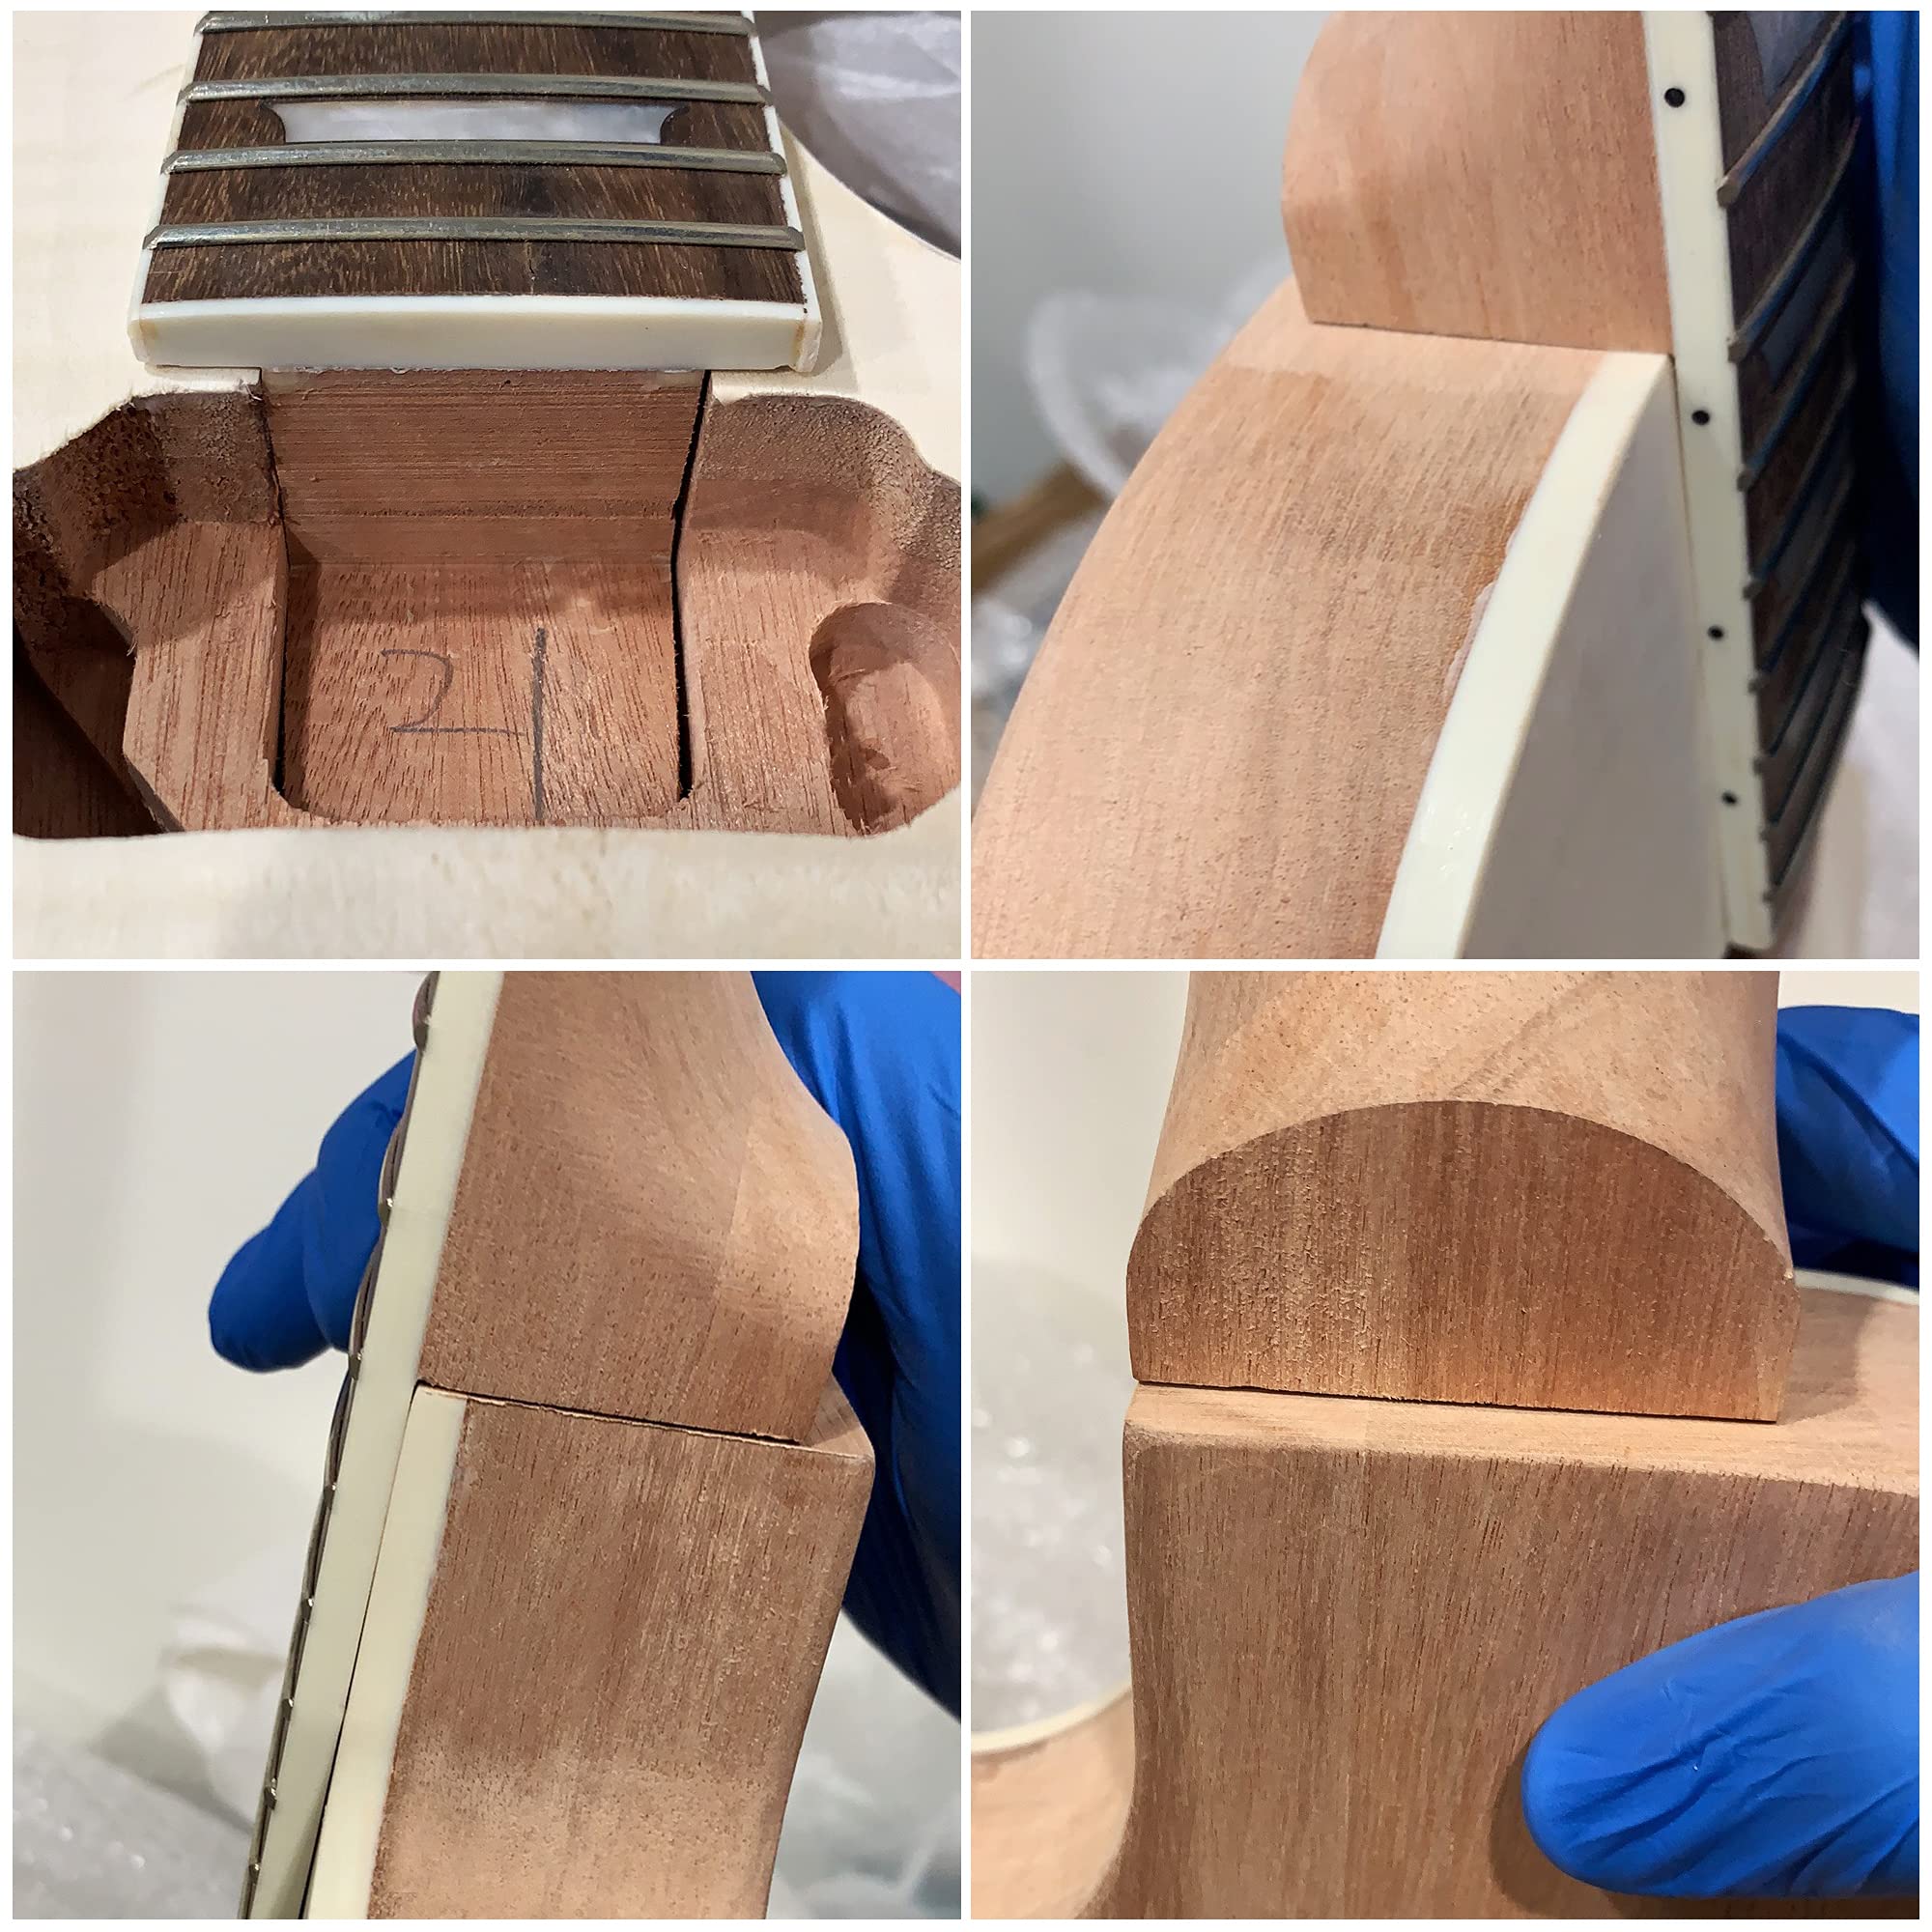
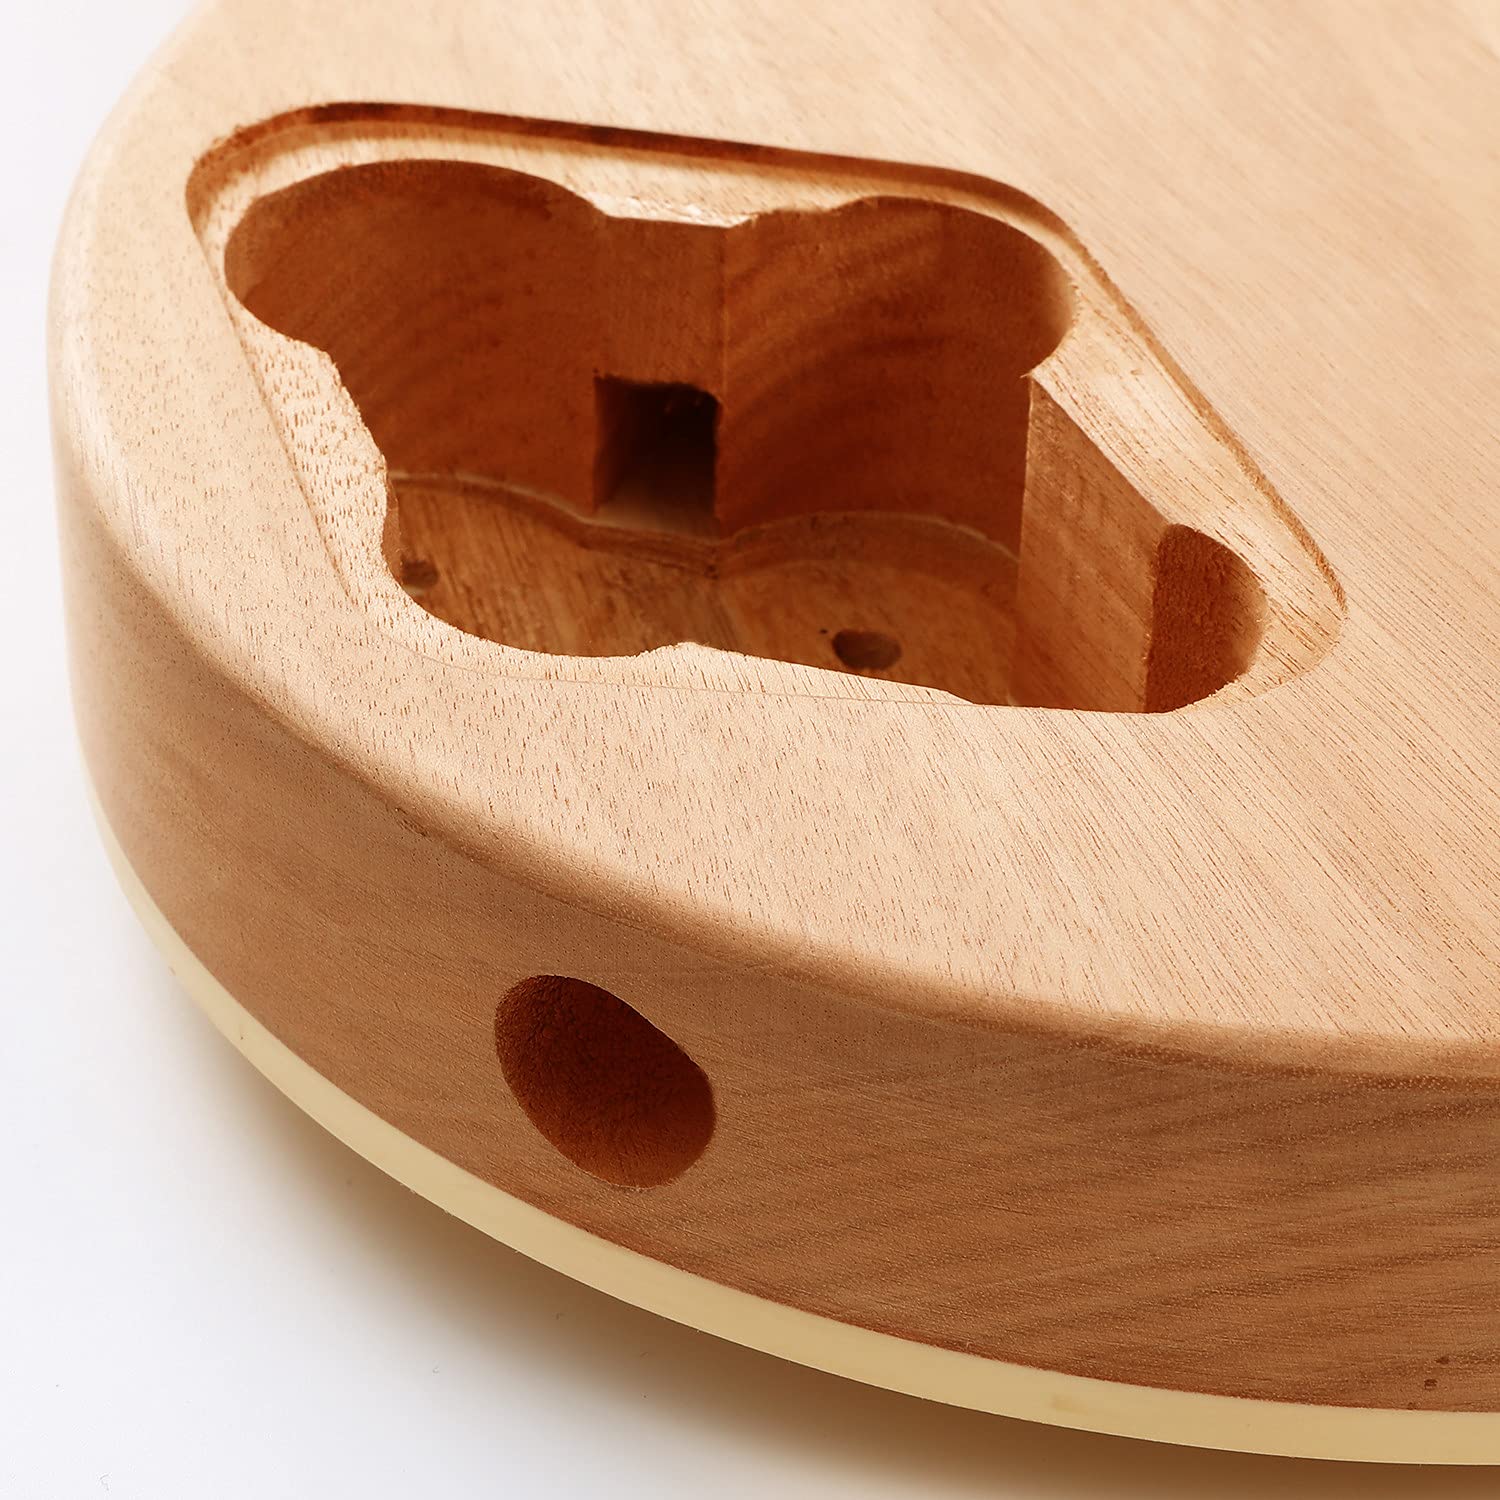
I have wanted to get back in to guitar playing for many years, and since I'm a crafter, I figured this would be a great way to get two birds stoned at once. I had this on my wish list and my wife got it for me and I was super happy, until it actually came to putting it together.There are NO instructions, so if you've played before and are the crafty type, you may be ok. I read the reviews and saw one person said their veneer buckled, so I made sure to use alcohol ink and it dries immediately. As you can see It looks gorgeous. I bough some wipe-on poly to finish it and also used tung-oil to bring out the richness of the grain on the back of the body.There are NO screws to bolt the neck on to the body. So from the front I made 4 pilot holes and happened to have 4 good size screws and screwed it on. The neck does seem pretty straight, but who knows what will happen to the truss rod over time if there even is one in there. I did also treat the fret board with mineral oil which was a good idea. Another problem I found is the edges of the frets are 90 degrees and sharp. I spent a while with a metal file, rounding the edges and dressing it as good as I could it . It worked out fine in the end.The mounting holes for the pickups didn't fit, so I had to sand them over a little larger with some tools. they are perhaps too snug, but they fit. There is also no hole to run the ground wire to the post, so I had to drill a hole inside to meet up with the post hole.Like I said, there are NO INSTRUCTIONS. the pots are wired and soldered together, so I have no clue if they are right or not, internet videos showed me the difference between A500 and B500. what I assume is the grounding wire based on directions I found online and finding it was connected to the black wire were just twisted together and bare.Because there is no marking as to which is the neck pick-up and which is the bridge pick-up, you basically have to make an educated guess and then using the powers of the internet, connect the wires to the pots and hope for the best.I love a craft project, but if you don't know anything about wiring diagrams or guitar building, you probably want to keep away.The pickups are so cheap, I had to lower them down a lot so they weren't up against the strings.There are no pre-drilled holes for any of the screws, so I had to do that carefully. Also all of the internals are just thrown in together in a bag, so again using process of elimination, I had to separate all of the screws and try to match them with what they would go with to have a chance of using the right screws.I finally about 15 minutes ago finished it and hooked it up to the amplifier. I got one volume control working, but the other 3 don't seem to do anything at all, either its wired up wrong because the whole thing is a mystery, or they just don't work.final verdict:If you ran a guitar shop and knew guitars inside and out, and could make this work, then go for it. but if you are just a regular joe schmo, then I'd give a pass, especially since it was almost $200, I don't want to throw even more money at it to purchase premium pickups and internals.... save the money and just go buy a guitar. unless you like a challenge and being annoyed at cheap wiring...pros:The woodwork is decent (even though there is a crack in the fret board at the bottom)The neck and body are just fine.cons:no instructions.poor wiringpoor pickupsno instructions.missing screws.no pilot screw holes.missing hole to ground to the bridge post.cheap plastic for the covers on the back.no clue what screw goes with what part.no instructions at all.If I didn't have it constructed and finished, I'd get a refund.
K**Y
Top has MANY flaws
I’ve tried two of these from Batking. Both tops have so many flaws that unless you are painting a solid color it’s not worth it. Super thin veneer with edge flaws and glue on the veneer make a nice stain or dye impossible. I just packed it up and sent it back. If you want to stain a guitar kit, DO NOT BUY THIS KIT!Also, I had to fight to get a refund weeks after I sent this product back. Bad product, bad service.
A**E
Not for the faint of heart.
The flamed maple veneer is gorgeous, I think. I upgraded all the hardware so I can’t comment on the included hardware other than to say I’m not going to put that junk on my guitars. My review will cover the body and neck.Unboxing was a delight. The body and neck both looked great. Keep in mind, they are unfinished and that doesn’t just mean they need painting. The nut is not installed. The frets are at 90 degrees and have sharp edges. You will need fretworking tools. The neck was straight as an arrow out of the box. It fit the body cavity well and the scale length was exactly as advertised.The body was also very nice. The flamed maple is a very thin veneer so don’t sand it too much. I did have to modify the body in a few ways to make parts fit correctly. First, the neck pickup routing was about 3mm too high. Strings did not go directly over the pickup poles. I trimmed that off the bottom of the pickup cavity and then it lined up perfectly. Second, there was no hole from the control cavity for the bridge ground at the saddle mount. I had to drill my own. Lastly, the wire routing for the neck pickup is at the top of the cavity and runs longer than any pickup wire. Out comes the drill again to drill a “shortcut” from the bottom of the pickup cavity (where it’s supposed to be) to the wiring channel near the control cavity. Speaking of drilling, none of the pickup ring or pickguard holes are drilled. Measure twice, drill once.It’s was worth the work because it came out great. If you buy one of these, take your time, watch YouTube vids and read. The key to getting a decent guitar out of these is to make sure your measurements are precise and to do good fretwork. I would actually play this in public.
D**S
Decent kit but not for beginersrs
Not for beginnersFret work is horribleYave to do a complete level and crowning of frets and dressing of ends! They are literally cut off flush with fretboard and are very sharp to the touchBody is 2 piece mahogany that does not match at all must paint to hide !!!!Tuner holes on headstock were drilled wrong and they do not line up strait at all....Pretty disappointed with this kit!!!!the pots are cheap dime size and wired together wrong! The holes for the pickups are to small and had to rout them bigger just to fit the pickups that came with the kit!
T**P
Very Good Kit!
Months of work but the payoff speaks for itself. Very good quality wood and all the measurements seem to line up nicely with epiphone style products like hardware, pickguard etc. Or atleast they did for me. Very happy with the end result. Will probably purchase more in the future.
TrustPilot
vor 3 Wochen
vor 1 Woche