🎉 Mold Your Imagination with Ease!
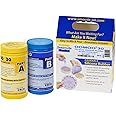
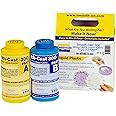
Smooth-On OOMOO™ 30 is a user-friendly tin cure silicone rubber kit designed for mold-making in both artistic and industrial applications. With a simple 1:1 mix ratio and a curing time of just 6 hours, it's perfect for novice mold makers looking to create high-quality molds for sculptures, prototypes, and more.


C**E
Amazing for beginner mold makers- and some tips!
I am a doll sculptor teaching myself how to make replica parts of my pieces to expedite production, and I've experimented with a few different products for casting parts and replicating them: none of them beat out the results I got with Smooth-On!The 1:1 ratio is very simple and while you will waste some product in your first couple of rounds, you very quickly begin to be able to eyeball the measurements per mold; I've made 5 now and I can pour without weighing the pieces, without wasting product.I began with using foam core and hot glue to create the vessels in which to pour the silicone onto the pieces, but it was very messy and time consuming; I now swear by using Lego bricks instead and wrapping the edges of them with Frog Tape to avoid leakage.I haven't had any issues with curing, perhaps because every time I pour I mix each part in their respective pots for about 30 seconds before I pour to mix them. I'll then use wooden skewers to mix them together for about a minute before preparing to pour.I use a small spatula to help get the silicone off the sides of the mixing cup as I pour, ensuring I use as much product as possible per batch.Two-part molds have been easy and amazing with this. Just be sure to use sulphur-free clay and make keys in the clay before making your first mold part. As for the second part, I have the best results with simple Vaseline; I use a cheap paintbrush to apply the Vaseline to the mold and get into every crevice. I've had molds ruined with mold release spray not working well enough, but never had a single issue separating my mold parts with Vaseline.Smooth-On also makes my favorite material to cast my molds: their Liquid Plastic! The drying time is very fast and I can easily sand off the seams with fine grit sandpaper and buff it with a polisher. If I need to patch anything up, I can use air dry epoxy clay.Overall, Smooth-On is by far the brand I trust and have had the best results with as a self-taught mold maker and sculptor!
D**)
A little goes a long way; be judicious in how you set up your mold
Excellent stuff.Mind you, my mold-making is in its infancy, but this material is proving to be a good place to start.It mixes at a 1:1 by volume, which is helpful for those of us whose basic arithmetic is somewhat lacking (such as myself). Part A is significantly more viscous than part B. Be patient when measuring it out, as it does have a tendency to overshoot whatever it is you're trying to measure to. I've been using the lines on two separate solo cups for measuring my components. I've also been mixing in a bowl-shaped tupperware container (polypropylene). The cured rubber pulls right out of it. Be wary about using glass; the cured product stuck quite efficiently to a glass stirring rod that I used, which I'm just gonna have to take the time to scrape off. Spraying a mold release on any glass items you're using may do the trick.The rubber cures with a good flex, but still stiff enough to cut with a reasonably sharp knife. The instructions say to bake for four hours at 150F after it's cured to rid the mold of the alcohol that's produced as a by-product of the reaction.Now, a word of caution: When setting up your material for the pour, make sure you're within the bounds of one quart of liquid. Expect to go through no less than a full kit for a large mold! If you find yourself trimming off a lot of your mold, save your offcuts; they work nicely as fill for subsequent molds.The extended cure time is a godsend. Every detail comes out and there's not a single bubble on the workpiece. I molded some metal parts and found that even the particularly fine grind marks on the steel came through in the silicone. Allegedly, oomoo25 also does not require degassing, but I remain skeptical.All in all, this stuff's great. Take your time, be patient, get everything set up properly, and have fun!
C**K
Worked Great!
I thought this product worked pretty great. I didn't read the reviews before hand and I guess I'm glad I didn't. As the description state, this is a product has two compounds that come in two different bottles. You measure (I just used a regular measuring cup) the same amount for both compounds, mix thoroughly and pour into/over whatever you are making a mold of. One bottle will have a blue compound that is a thin-ish consistency and the other bottle is a pink compound with a much thicker consistency. I did read some of the other reviews and they mention getting the product and the pink compound was super thick, "chunky" or even solid. The instructions that come with the compound do mention that the product does not have a long shelf life, and actually recommends using it ASAP. So I am guessing that is what happened to other people, they either ended up getting the compound that had been sitting around awhile or didn't use it fast enough after they recieved it.The instructions mention using a releasing agent, I didn't. It worked out fine for me. I was using several different objects of different types of materials to make molds of and I didn't have any issue de-molding anything. I'm not going so far as to say you don't need it, but I would say that I don't know that it is necessary. I will say the objects I was making molds of didn't have a lot of nooks and crannies that the molding compound would make it's way into, most of the surfaces were flat and smooth.I thought there could be some more clarity in the instructions. The instructions mention a "cure time" and a "pot time". Cure time is pretty self explanatory for most people (how long it takes for the product to set up.). But I wasn't and still am not sure what "pot time" is. I have an idea, but again, not 100% sure.My one big piece of advice for using this would be to have a game plan in place before you start making molds. I had a vague idea of what I was going to do and ended up making a bit of a mess. The two compounds have different consistencies so an idea of how your are going to mix these thoroughly is necessary. I mix these compounds in a dixie cup with a chopstick (I realize now how ridiculous this sounds) and I thought I had mixed it well, when I went to pour the compound into the cookie sheet I was using I saw there were parts that hadn't mixed as well. The instructions call out that mixing it thoroughly will yield the best results, so I felt like i was kind of scrambling to get it all mixed before the compound started to set up.I did mention before, the mess. This is a really messy process. Luckily I found that clean up was SUPER easy. I was kind of worried about it since I was getting compound all over my cabinets and hands and everything. But I wiped up most things with a paper towel and then soap and water after the fact. Very easy to clean up.
Trustpilot
2 months ago
1 month ago