✨ Transform your hair game in a flash!
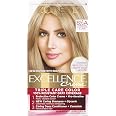
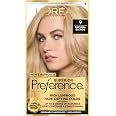
L'Oreal Paris Couleur Experte Color + Highlights in a Flash is a revolutionary at-home hair coloring kit that allows you to achieve salon-quality color and highlights in just 30 minutes. This dual-system kit combines permanent base color with harmonizing highlights, offering a range of shades to suit every style. With easy two-step application, you can enjoy vibrant, even color without the salon wait.


M**R
This is a wonderful time and money saving product
This is a wonderful time and money saving product! I have used it for years and will hopefully use it for many more. It did take me some time to find the technique best for my needs......trial and error. I am sharing what I have learned:1. Remember to put some sort of vasolene or Abololene-type moisturizer around ears and hairline, front, ears, nape of neck, to prevent color bleeding onto your skin. Wear an old T-shirt and remove any rug or towels etc. from the area. If you are like me you may end up with this on places other than your head!2. Don't try to color on hair that has heavy styling products, especially spray, as it makes it harder for the color to permeate your hair. I don't think a little gel, or mousse will hurt, just the heavier products.3. I like a multi-color look and will vary the colors within a shade or two every now and then........light brown one month.......dark ash blonde next month.....whatever floats my boat. After a few applications over half a year I achieved the multi tone look and it automatically renews itself each application as the placement of streaks varies each time. I end up coloring darker some of the blonde from a previous use and then highlight some new spots too.The fiirst time I used this I did my whole head and would repeat within 4-6 weeks. It really is not totally permanent. However, some of the color does remain but looks about half a deep as the original as the weeks go by. Now I merely apply the color to roots and temple area, where my gray is. Then I use a very wide tooth comb and coat with the solution.........comb this through one area at a time, top to bottom, just once.......continuing around my head. Not all the hair is recolored. This way I am adding new, darker shades, and keeping the faded, lighter colors, along with some of my own natural growth. Again, great for the multi tonal look.4. After rinsing you can apply highlights to wet or dry hair......I prefer dry as I literally 'brush' the strands like the French Bayalage method. While waiting for the lighting mixture to work the chosen strands will benefit from a redabbing of the cream or at least a little wetting to keep the mixture wet enough to work into the hairs. I find that if I paint the spots I want and then cover my head with saran wrap and a towel if you don't want to look too weird ;) and then wait the full desired time, the hair lightens best. They stick you under the dryer in salons......heat really helps and the saran wrap captures body heat well. Don't try to do too many strands as it is good to have a teaspoon or two left for recoating should it be taking a bit too long to get to the color you want and you want to recoat. There is not that much mixture to begin with.5. Professionals disagree on whether the hair should be 'wet' or 'dry' when highlighting. I prefer dry as when the hair is dry I can see better how the curls/layers/waves are falling thus aiding in the positioning of my streaks.....which as I said I actually brush on with the brush applicator included in the kits. Also, and I think this is really important for those of you with short hair, or long hair you like to wear up or frenchbraided once in a while........When applying highlights lift up hair around your head.......here and there......and brush on a little lightener scattered all over the underneath hair. This way the streaks will appear when underhair is exposed adding dimension and natural, sun kissed look. These streaks don't get as light as the ones around your face and that is the look stylists go for.6. Also, I love a few very light streaks around my face and the lightener in this kit doesn't go too light easily. So, now I pull strands I want very light forward onto my face to keep separate from the rest of the head and highlight them later with a separate kit. There are several quick lighting ones available........inexpensive and easy to 'paint on'......though I actually 'coat them well' to really get the bleach into them. I only do this to two or three strands on either side of face (near ear, mid head, temple area)......and then about three across the top.......positioning not too evenly apart so it looks more natural. I don't care for the 'every three hole' in the cap look. You don't have to leave them on your face when coated. Just push them back over the other hair. They will be stiff and won't lean heavily on the newly colored hair and if they do touch they won't harm anything.These strands will lighten pretty quickly as they are not too thick. You can recoat them too as you wait if they dry out but they should get to that super light shade you want........be patient.When completed and all is washed out be sure to lather on the enclosed conditioner, though I often use a more heavy duty treatment.......and leave on for an hour or so. It isn't necessary, but you'll be amazed at how soft your newly colored/highlighted hair will be.....which isn't always the case for these jobs.I know this sounds like a big hairy deal. No pun intended. There are many little steps to follow, but they are all easy and the results are more than worth it. I usually do this on a saturday morning.......warn everyone that it is 'do my hairs' day ;) and it takes about three hours from start to finish. A small price to pay with a little inconvenience.......but I'd rather have the $250 in my pocket and besides I get to do it my way. Hair dressers don't ever seem to get it just the way I want.ps One more important tip: If the color is too brassy for your taste it can be nicely subdoed with a 'color rinse' like FanciFul. Frivolous Fawn is great for us light brown with blonde highlights.pps I dab my fading eyebrows with some of the base color with a Qtip.......not the lashes!! This won't last as long as the full job but you'll get a couple of weeks of nicely colored brows so important espcially for us 'boomers.'I like a multi-color look and will vary the colors within a shade or two everynow and then........light brown one month.......dark ash next month.....whatever floats my boat. After a few applications over half a year I achieved the multi tone look and it automatically renews itself each application as the placement of streaks varies each time. I end up coloring darker some of the blonde from a previous use and then highlight some new spots too.
A**G
Fast and easy hair color and highlights
I have been using this coloring and highlighting kit since the 2020 pandemic and I love it. It is so easy to use and saves me a lot of money over going to the beauty salon. The light ash brown was the perfect color for my normal hair color and the finger highlights actually look salon done. I have naturally curly hair and even if I get more highlights in some strands than others it is not noticeable because the highlights are subtle. The finger tip was hard to use the first time or two that I used this kit but after I got used to it I feel like a pro now. It is a fast and easy hair color and highlight kit.
M**Y
Love love love it
I've been using this product since it first came on the market and fell instantly in love with it! Unfortunately, it's difficult/impossible to find in the stores around here, especially in this color. Which is odd considering I live in a large city. Fortunately, I am able to buy it on Amazon.First of all, my natural hair color is a darker strawberry blonde that gets very blah looking in the winter. This color brings my hair to almost exactly the color on the box without looking fake or having a weird tint to it like some red hair color can do. I think it would make darker hair look very pretty but pale blonde or grey hair might look more clownish (this is just an observation).The kit is very easy to use and when I've finished the entire process, my hair feels very healthy and looks shiny. This was especially noticeable after using it this last time, since my hair was pretty dry after spending the summer at the beach/pool/in the sun. I couldn't believe how much healthier my hair looked AFTER putting color on it since I've always heard coloring your hair damages it. After a little research, I found that when you deposit color (make it darker) it can make the cuticle thicker and would then make dry/sun damaged hair look/feel better and this was true for me.The highlight portion of the process requires either an artistic eye (to do it yourself) or for better results, ask someone else to do it for you so they can see how it looks on your entire head. I've never had a problem doing it on my own, but it always looks better when someone else does the highlighting part for me.I would definitely recommend this to anyone who wants to do their own haircolor (and doesn't want to/can't afford $200 for a salon color). My hair turns out just as nice as when I've had it colored professionally at a high-end salon and it lasts just as long with proper care (not washing too much, no chlorine, sulfate free shampoo, etc). It also grows out nicely and fades gently (red hair is difficult to keep bright) so it's easy to blend in new color to do the roots.
Trustpilot
3 weeks ago
2 weeks ago