Ironing Made Effortless! ✨
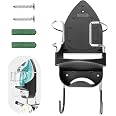
This Wall-Mounted Ironing Board is designed for modern living, featuring a durable steel construction with a stylish white epoxy coating. Measuring 37-3/8'' L x 11-7/8'' W, it easily mounts to your wall and swivels 90 degrees left and right, locking securely in any position. Complete with a cloth ironing board cover, it’s the perfect blend of functionality and aesthetics for your home.
K**E
Excellent to use, high quality, install tips
This is a very high quality, sturdy ironing board - it's German, so, of course, it's over engineered. Works perfectly in our fairly tight laundry room (see pics).Install tips:1) This is pretty heavy, so I don't recommend the drywall anchors supplied with the board. They have to be *perfectly* installed to not pull out of the wall; instead, I recommend (picture below) installing a board on the wall first into studs, and then attach the ironing board to that. The ironing board is too narrow to match 16" studs, so you could only get one side into a stud, so you could use drywall anchors on other side, but I don't recommend that.2) Take a piece of 11x14 paper and masking tape it over the mounting frame, and then lightly trace the mounting holes (for the top holes, make sure you trace the *small* part of the mounting holes) and edges of the entire frame onto the paper; also, make lines where the top of the ironing board is and the bottom of the ironing board frame, so you can tell how high to mount it. You will find it **much** easier and less frustrating to position the ironing board with this template. Use a level with the template, tape it to the wall/board, and then drill your pilot holes; remove template to install.3) A standard ironing board is 3 ft off the ground - use that as your reference for how high to mount the board.4) Install top screws 85% *first*, then you can hang the board on these with larger part of the mounting holes, then tighten them up, and then add the bottom screws.5) When drilling mounting holes, make sure the drill bit is 10% smaller than the *shaft* of the screw - not the threads.
M**G
THE BEST PURCHASE FOR LAUNDRY ROOM!!
I get so many compliments about this ironing board from everyone who comes to my house! We have a small laundry room/pantry so this is it space saver!! It is great for folding clothes and ironing and also for small storage of freshly folded clothes until we put everything away!
J**G
Works perfectly for that which it is made for!
Sorry this ironing board is getting a bad rap.This is a European style - space is at a premium and this takes up little of it. It did take up more than I expected, though. Please see the picture - the folded board needs 5" from the wall, so mounting behind a door is not the best idea. If you have a board across the studs, you will need 5" plus the thickness of the board.I also attached my picture of a piece of plywood to hold the ironing board. The manufacturer expects people to have a knowledge of mounting things on walls. Yes, it will not mount well to our 16" studs. Mount an 18" x 8" ... length to hold the board or -- as I did -- longer for looks. You do not need six lag screws - four is fine.As for those that say they "use their board daily" or that it doesn't stand up for wear - get a full sized ironing board! This is made for singles or young couples, or older, retired people, who do not need a board often.I know some people lean heavily when they iron - don't buy this, then! If you have to lean heavily, you might want to reconsider how you iron. My $.02.
J**R
Take the time to install it properly
1. Find the studs in your wall and confirm the distance between the center of the studs. (I pound small finishing nails through the sheetrock behind where the plate will be mounted). Mark your wall at the desired height along the studs. (the ironing board surface is 1 1/2 inches below the top edge of the mounting bracket). 2. Center the ironing board base on a piece of oak on your work bench (use hardwood only). 1" thick, 28" long (my laundry room wall studs are on 24" centers) and 7 1/2 " high. You'll use a mounting board length based on your wall stud spacing. Mark all the ironing board bracket holes on the mounting board using a pencil. Remove the ironing board assembly. 3. Measure in from both edges of the mounting board and pencil a line across each end of the board so that the distance between the lines exactly equals the distance between the center of your wall studs measured in step 1. Drill 3 wall mounting holes along each line in the mounting board. I used #10 X 2.5" wood screws with a 3/8" by 1/8" deep countersunk holes to allow for the plugs as seen in the attached image. 4. I then drilled two holes exactly at the center of the mounting board (1" in from the top and bottom of the board) and behind where the ironing board plate will be mounted. IMPORTANT! Countersink these holes as well. These holes I used to add additional support to the center of the mounting board using the sheet rock anchors included with ironing board. 5. Pre-drill the 6 top and 6 bottom bracket mounting holes you marked in step 2. I used #10 X 1" stainless screws for the top holes and #8 X 1" screws for the bottom holes. You should now have a total of 8 wall mounting holes, all with a 3/8" countersink and 12 bracket mounting holes in the mounting board. 6. Have your assistant hold your mounting board exactly centered vertically and horizontally on your wall with a level across the top of the board. Drill shallow holes just into the sheetrock through the previously drilled 8 board mounting holes. Remove the board and finish drilling the 6 end mounting holes into the studs and the 2 center holes through the sheetrock with drill sizes to match the screws you've chosen. Hammer the wall anchors into the center sheetrock holes. 7. Screw the mounting board into the wall making sure that all screw heads disappear into countersunk holes. 8. Remove the board from the wall then sand and paint as desired. 9. When dry, remount the board to the wall (8 locations). Start the 6 top ironing board mounting screws, screwing them in all but about 3/16" from the mounting board (out just enough to now slip the ironing board assembly onto the mounting bracket). Tighten the 6 top mounting screws and then insert the 6 bottom mounting screws. Other than installing the 6 end plugs into the countersunk holes....you're done!
Trustpilot
2 days ago
1 month ago