Breathe Easy, Live Fresh! 🌬️
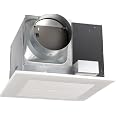
The Panasonic FV-30VQ3 WhisperCeiling Spot Ventilation Fan is a high-performance bathroom fan designed for quiet operation and efficient airflow. With a powerful 290 CFM capacity and a noise level of just 2 Sones, it ensures a serene environment while effectively ventilating your space. Its durable, rust-resistant construction and Energy Star certification make it a smart choice for eco-conscious homeowners. Installation is a breeze with user-friendly features, making it a must-have for modern living.
| Brand | Panasonic |
| Color | White |
| Electric fan design | Blower |
| Power Source | Corded Electric |
| Style | 290 CFM |
| Product Dimensions | 19.01"D x 15.98"W x 12.51"H |
| Room Type | home |
| Special Feature | energy star exhaust bath fan, energy star |
| Recommended Uses For Product | Home |
| Noise Level | 2 Sones |
| Wattage | 64 |
| Finish Type | Steel |
| Air Flow Capacity | 290 Cubic Feet Per Minute |
| Blade Length | 26 Inches |
| Theme | Modern |
| Voltage | 120 Volts |
| Collection Name | Panasonic's Collection |
| Switch Type | Push Button |
| Item Weight | 4 Pounds |
| Included Components | Energy Star Bathroom Fan |
| Indoor/Outdoor Usage | Indoor |
| Model Name | 2-Sone 390 CFM |
| Control Method | App |
| Connector Type | Standard Electrical Plug |
| Blade Material | Plastic |
| Reusability | Reusable |
| Efficiency | energy-efficient |
| Is Cordless? | No |
| Number of Power Levels | 1 |
| Main Power Connector Type | Standard Electrical Plug |
| Manufacturer | Panasonic |
| UPC | 092281134505 807032955571 |
| Global Trade Identification Number | 00092281134505 |
| Size | 290 CFM |
| Part Number | FV-30VQ3 |
| Item Weight | 4 pounds |
| Country of Origin | USA |
| Item model number | FV-30VQ3 |
| Is Discontinued By Manufacturer | No |
| Finish | Steel |
| Item Package Quantity | 1 |
| Number Of Pieces | 1 |
| Special Features | energy star exhaust bath fan, energy star |
| Batteries Included? | No |
| Batteries Required? | No |
| Warranty Description | ALL Parts: For period of 3 years (36 months) from the date of the original purchase. DC Motor: For period of 6 years (72 months) from the date of the original purchase. |
N**7
Works great in my kitchen
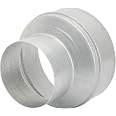
My home has been remodeled over the years, the kitchen ended up being in the center of the house with no window to outside for direct airflow and the self-vent that came with the over-the-stove microwave has been no match to get rid of aroma from cooking. We recently had another remodeling done and I decided to install this FV30CQ3 over the kitchen ceiling and make a Y vent duct join (with damper) to the down stair bathroom to vent it outside of the house. Even though it's only 2 weeks since we have it installed, I am very happy with it.As I have it installed by the contractor, I can't say how easy/hard it is to do that. But I can say this:- Ordering and shipping was a breeze. The fan got here in 3-5 business day as well packed.- This fan has a damper built it - so no reverse air flow through the fan when it is not in use (critical point for me as it uses the vent from Bathroom!!)- Vent pipe from the fan is 6" but Y-join it to a standard 4" to avoid tearing down ceiling to rerun the vent duct. My kitchen is 14'L x 12'W x 9'H with openings to two living rooms (each slightly larger than kitchen).When turned on - it generates some hissing fan noise but not so loud at all. When I sit and watch TV in the living room, I cannot hear that vent fan at all. I am most impressed with the ability to vent the air out (remember it is hampered by a 6-to-4 in. vent duct). We cook a lot of strong aroma food (Thai, Chinese, Italian, American, ...) and with this fan, we no longer suffocated with the aroma. I normally turn it ON when we start cooking then another 15-20 min. after we are done - and the whole kitchen and living rooms are aroma free. Besides, when we just turn it on for 30 min. during the day, it does refresh the whole down stair quite well - I guess 320 CFM is a lot of air circulation (again even with the 6-to-4 in vent duct)I am very happy with this decision.Note:In my personal view, install a real kitchen vent over the stove is an over kill because- They require at least $1,700 in total cost including installation and redo all the vent pipe, modifying cabinetry, redo drywall (in my case)- They all generate a deafening noise when turn on (no matter which brand)Panasonic says in the manual that this model is not meant for use in Kitchen but I use it anyway simply because of the noise it generates, easy installation and overall cost. Even if it will die in 3-5 years from oil clogging up in the motor, I'll just replace it with a brand new one and boldly move on with this approach.
W**L
290 CFM Version Notes
I'm writing this review for the 290 CFM version of this fan. Amazon's offering provides the option of selecting a 190 CFM version, and I believe the product description is for the 190 CFM version since it indicates that an "adjustable mounting bracket (up to 26-in)" is included. Please note, the 290 CFM version does not include an adjustable mounting bracket. However, it does include hardware for suspended ceiling installation if that is your need.Assuming you are installing the 290 fan between ceiling joists, you will need to construct a mounting bracket (frame) out of 2x4's. Building it is easy. Dimensions are included in the instructions. Note that the frame dimensions indicated are "interior" or opening dimensions needed to place the fan housing through, and you will need to increase the size of some the 2x4 cuts by 3 inches to account for the thickness of the 2x4's. I can hear the carpenters out there saying "duh," but if you are like me, this detail may save you some time. ;-)You need nothing more than a hand saw, cordless screwdriver, tape measure, an 8 ft -2x4, and about 16 - 2 ½ inch wood screws to build the frame and attach it to your joists. Once constructed, you secure the frame to your ceiling joists with the same wood screws, insert the fan into the frame opening and secure it by screwing the flanges on the fan housing to the constructed fame. I used 1¼ inch multipurpose drywall screws to attach the flanges in fan housing to the wood frame. Once that's completed, all that remains is connecting the electric supply and duct to the fan.The fan is designed to feed a 6-inch duct. I had an existing 4-inch duct to tie to and had to purchase a 6 to 4 inch adaptor/reducer that I attached directly to the fan housing with aluminum sealing tape. I also recommend using the tape to seal any small gaps between the ceiling sheetrock and fan housing flanges. This will prevent the fan from drawing any air from above your ceiling - just a detail - not a big deal. If you have some flexible batt insulation available, I'd also suggest wrapping a piece of it around the connection of the fan with the duct. It may help reduce some of the fan noise when running it at the highest speed.Now to the fan. This unit is my second Panasonic fan purchase. The first was a lower CFM unit for a bathroom renovation I did earlier this year. The quality of that fan is so good/quiet that there was no question in my mind what brand to buy when I needed another one. I'm going to soon replace an old and almost worthless fan in a second bath I have with the same model.As a side note, I am not inclined to give praise to ceiling fans one way or the other. However, the bathroom fan runs automatically when it senses movement, or when the humidity gets too high, keeping the area, including grout and caulking, clean and mold-free. I'm not a mold freak. The crap I deal with periodically makes mold relatively insignificant in my mind. However, cleaning grout lines or replacing discolored caulking is an annoying waste of time, in my opinion.I'm using the 290 CFM fan to ventilate my kitchen. Due to wiring and plumbing runs in the wall adjacent to the stove, the range hood does not ventilate to the outside and only circulates air through a charcoal filter. It generates more noise than benefit. The primary issue I am addressing with this fan is dealing with smoke from the broiler that will occasionally set multiple fire detectors off.My kitchen is 10 x 12, and I installed the fan approximately 5 feet from the range top (not directly over it) to reduce the potential of vaporized grease getting into the unit. A four-speed wall switch controls the ceiling fan. Even at lower settings, it does an excellent job of removing steam and smoke from the area.Regarding noise, at the two lowest speeds, you can not hear the unit. The switch controlling it has LED setting indicators. Otherwise, I would not easily know when the fan was operating. On the third-highest setting, you can barely hear it. At full speed, you can hear the fan and some light rattling noise, which I would guess is caused by pushing a high volume of air through the reducer into the 4-inch duct. For comparison, the sound is much lower than what is generated by my range hood, and I only need to run it at its highest setting to quickly remove more substantial volumes of smoke. Otherwise, the lower settings are more than adequate.Overall, I'm happy with the purchase. My wife was opposed to installing this fan because she did not like the idea of introducing the fan's vent cover into the middle of the kitchen ceiling. The vent cover is slightly creme-colored, so I spray painted it out to match the bright-white ceiling color. That, combined with the fan's silence and convenience, converted her. However, that's not implying that she thinks I was right, much less smart, in pushing the fan installation. After 35 years, she might reluctantly acknowledge I was lucky that it works well. Like most guys, I work around the house in quiet obscurity and derive sufficient reward when my effort delivers the results I had planned.
B**E
Moves Air - Nice After Installation
Put that in the master bathroom. It is by far not as quiet as the smaller whisper fit units etc...however it is ok when taking a shower and moves plenty of air. I would give it 4 stars after installation. I gave it 3 stars for the amount of effort needed to install it. First of all with the size it can only be used for attic etc...also ..you will need to build a frame with 2x4s to mount it. There are just a couple of things that dont make sense for a primarily attic installation..for example why cant it be screwed on top of the drywall instead on top of the 2x4s ( would make it easier ). Exhaust and the electrical box are in the way for a full circle 2x4 frame. 2nd irritation is the location of the electrical box...again - for the attic it would be more convenient , if the box would be higher up and easier to reach. One comment about the noise...it does sound like mechanical noise on top of the wind noise...that is a little disappointing..Update 3 weeks after InstallationI think the noise is mostly wind noise and not any mechanical noise. It sucks the air out very well..it is a smaller/mid size bathroom and the door is harder to open and you can feel the air flowing under the door. It does a very nice job at getting rid of the moist air. It is not very quiet...but it is on a timer and you cant hear it in the next room. Probably quieter than most builder's grade fans anyway. I think the spec says it is around 2 sons. So we turn it on when done with the shower/bath to avoid noise and cold air draft and it turns itself off with the timer. Works well.
Trustpilot
3 weeks ago
2 months ago